Showing posts with label rustic wedding. Show all posts

Saturday, March 15, 2014

Starting Over.

The last two years have been quite a journey.  I never thought I would use a power tool, let alone own several, and then become pretty skilled with them.  Never did I imagine I would be able to tell the difference between almond, oak, or olive logs. Never did I imagine I would be out in my garage working and sweating in the summer, or freezing in the winter - all to make something new from a log! Never did I imagine that I would enjoy sitting in a garage that was either too hot or too cold, music playing and working away on anything I wanted to make. Never did I imagine I would look at a log looking for the beauty of it and make something other people would want. Never. Funny how life does that to a person. 

With all that said,  I no longer have a workshop where I can keep the logs or use the loud power tools. Somehow I don't think an apartment manager would be too understanding of a 12" skilsaw revving up at 10:00 at night. 


This was a very tough decision for me to make, but instead of closing my shop, I have decided I want to start my shop over from scratch. I feel a bit lost, as the logs were such a huge part of my shop and life. I used to work with them about six days a week - now zero. It was a bit of a shock at first. But, I am not one to sit and dwell, but more of a "what can I do now" type of girl.  I have been teaching myself to sew, and looking into a variety of fun things to make. I hope you will bear with me as I go through a trial and error period.  I love a good challenge, and I am definitely up for it.


I will always be so grateful to have been a small part of so many weddings, proposals, gifts, and even funerals of people I have never met. People who trusted me to make something they would enjoy - I can't explain how amazing that feels - it just feels amazing. 

Maybe someday when I move again, I will make sure to have a workshop and just might get back into making log items as I really love doing that. :) This is a huge change, but I firmly believe in making the best of any situation and to always move forward. I am excited for the new things I will be making and hope you will be too.

Here are some of the things I have made that I loved making. Maybe someday I will make more. :)

www.etsy.com/shop/DeerwoodCreekGifts
www.pinterest.com/CindyBreninger
www.facebook.com/DeerwoodCreekGifts
www.twitter.com/DeerwoodCreek


Saturday, February 1, 2014

How to Make A Yule Log


Hi! Today let's talk yule logs. I have been by asked by a few people how I make them. They are pretty easy to make and if you have a saw, a drill, a sander, and a dremel, you can make them too. 
***Please note: I do not have a drill press. I normally drill by placing the logs in a vice and then drilling by hand. For the yule logs, I have found it is easier for me to keep the logs on the floor using my boots to hold the logs steady. Now, I know this is not the safest or smartest thing I could be doing, but, it works for me. My boots have been "accidentally tested" and the drill didn't leave a mark. But, please do as I say and not as I do. If you have a safe way to drill, I would suggest you do that. :) 

Ok, now that I got that business taken care of, here is how I make yule logs:

Step 1 - Get some logs and cut them to the length you would like. I usually cut mine between 10" and 14", but use whatever size you like.


Step 2 - Sand the bottom so it is flat. It is much easier to drill the holes when the logs are not rolling around.

Step 3 - I place the candles where I think they will look good and mark where to drill.


Step 4 - Remember - I do not have a drill press, so this is how I do this. Do not do this! Ok, now that I have lectured you on safety again, drill the holes. 


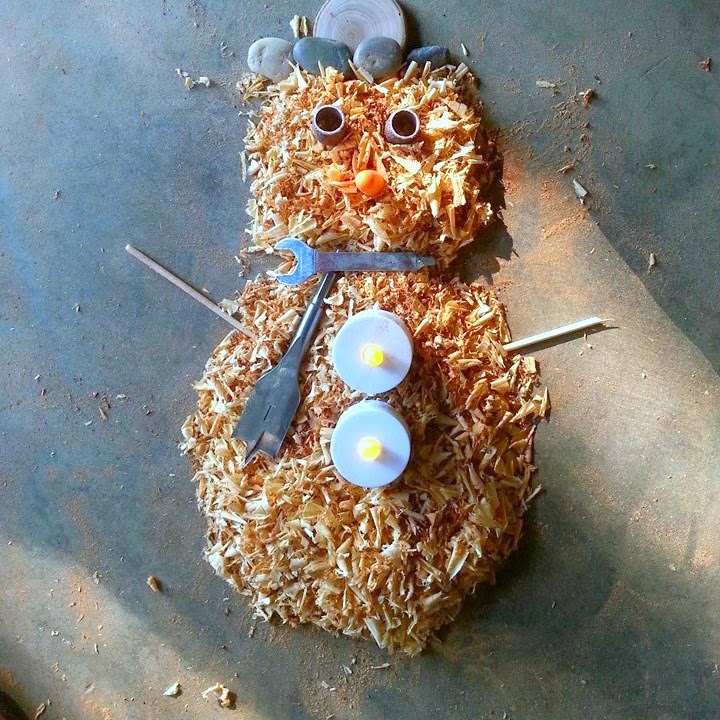
Step 5 - I have found that the yule logs produce A LOT of wood shavings. I mean A LOT! 


Step 6 - Once the holes are drilled, I use my dremel to clean up the sides of the holes so they are smooth. It also helps if you want the holes to be bigger.


Step 7 - Once you are done, whaaa-laaa! You have two yule logs. I love these and think they are so pretty. I hope you do too.


P.S. My drill tends to get pretty hot. So, when I am letting it cool down, sometimes I get bored sitting around and waiting, so I make sawdust "art". Here are two for you. 


Well, that is all I have for tonight. I hope you are having a great time making and creating new things. I love to create and love to stay busy - here's to lots of creativity for all of us! 

Cindy Breninger
Deerwood Creek Gifts

www.etsy.com/Shop/DeerwoodCreekGifts
www.facebook.com/DeerwoodCreekGifts
www.pinterest.com/CindyBreninger

Wednesday, April 18, 2012

Trying Something New

With working full-time and raising two kids, life can get pretty busy. With that said, some days I am not sure where I find the time or energy to head out to the garage to make some new items.

I wasn't feeling very well this weekend, but I had a few things in mind that I wanted to make. I kept telling myself that I would hang out on the couch, relax and get better; however, I kept having this little nagging voice telling me it wouldn't go away until I made what I was thinking about.

I slowly got up off of the couch and lugged myself to the garage. I ended up making 16 new things this weekend! Even though I wasn't feeling well, I would have felt worse sitting on the couch with all those new ideas floating around in my head. Hours went by when I was sure it was more like 20 minutes. The time flew!

I came up with some new items for my shop. On a whim I bought some chalkboard paint. I had never used that before, but I love it!

There are so many different things you can make and they are fun and easy and practical. I can't believe I had never heard of this before, I was missing out. I ended up using a glass square vase, painted it with the chalkboard paint, and now I have this cute four sided chalkboard table number centerpiece. I also painted different wood shaps and made those into tags that can be used for a wishing tree, table numbers - the possiblities are endless!

My son and I also made a bunch of log drink coasters. Usually we put a waterproof clear coat on them, but I am going to see if people would rather have them completely natural. We have both so it will be fun to see which they prefer.

I also made a personalized log wedding guest book pen holder which can or, if you want, it can also be used as a custom rustic toothbrush holder as we burn your initials or a word you like right on it. I am trying to branch out and find new things to make. I think I want to try log napkin rings and personalized log slice cake toppers. Something new for me so that should be fun.

I hope you try something new today. Please feel free to share what you are making. I would love to hear about it!