Showing posts with label dremel. Show all posts

Saturday, February 1, 2014

How to Make A Yule Log


Hi! Today let's talk yule logs. I have been by asked by a few people how I make them. They are pretty easy to make and if you have a saw, a drill, a sander, and a dremel, you can make them too. 
***Please note: I do not have a drill press. I normally drill by placing the logs in a vice and then drilling by hand. For the yule logs, I have found it is easier for me to keep the logs on the floor using my boots to hold the logs steady. Now, I know this is not the safest or smartest thing I could be doing, but, it works for me. My boots have been "accidentally tested" and the drill didn't leave a mark. But, please do as I say and not as I do. If you have a safe way to drill, I would suggest you do that. :) 

Ok, now that I got that business taken care of, here is how I make yule logs:

Step 1 - Get some logs and cut them to the length you would like. I usually cut mine between 10" and 14", but use whatever size you like.


Step 2 - Sand the bottom so it is flat. It is much easier to drill the holes when the logs are not rolling around.

Step 3 - I place the candles where I think they will look good and mark where to drill.


Step 4 - Remember - I do not have a drill press, so this is how I do this. Do not do this! Ok, now that I have lectured you on safety again, drill the holes. 


Step 5 - I have found that the yule logs produce A LOT of wood shavings. I mean A LOT! 


Step 6 - Once the holes are drilled, I use my dremel to clean up the sides of the holes so they are smooth. It also helps if you want the holes to be bigger.


Step 7 - Once you are done, whaaa-laaa! You have two yule logs. I love these and think they are so pretty. I hope you do too.


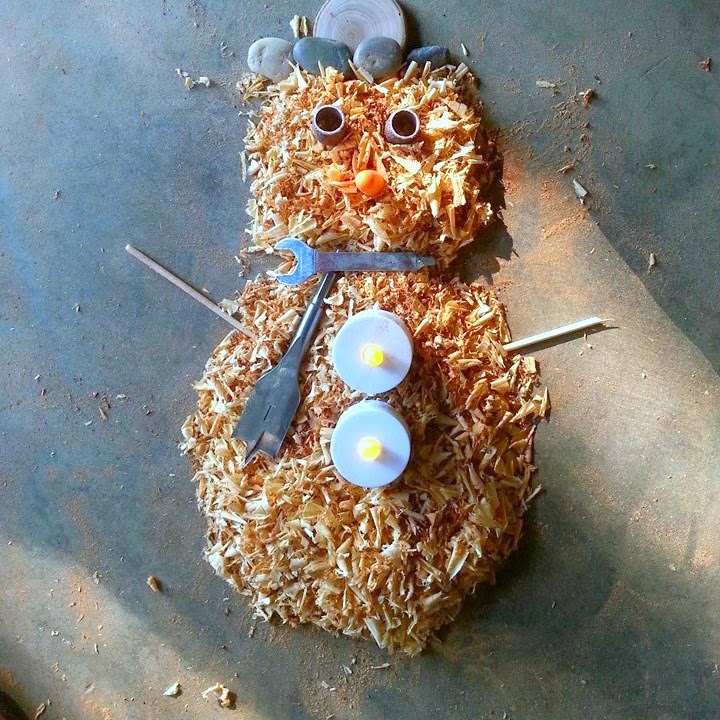
P.S. My drill tends to get pretty hot. So, when I am letting it cool down, sometimes I get bored sitting around and waiting, so I make sawdust "art". Here are two for you. 


Well, that is all I have for tonight. I hope you are having a great time making and creating new things. I love to create and love to stay busy - here's to lots of creativity for all of us! 

Cindy Breninger
Deerwood Creek Gifts

www.etsy.com/Shop/DeerwoodCreekGifts
www.facebook.com/DeerwoodCreekGifts
www.pinterest.com/CindyBreninger

Sunday, March 3, 2013

How to Make A Rock Air Plant Holder


Hi all!
I spent today in the garage hanging out with the dremel, some air plants, and a bag of rocks. Give me items like these and I will come up with something to make.

The first rock I wanted to use was pretty plain, sort of looked like a potato, but it had potential. I decided I wanted to make this into a mini air plant holder. I started by drilling three holes in the top of the rock. Oh, if you want to do this, please make sure you wear your goggles and a face mask.  I have said before that I don't want you to get bits of rock in your eyes or your lungs, so please cover up. Better safe than sorry.

I dipped the rock in some water and then started to drill. Since my drill is electric, I dip the rock in the water and then dremel on the rock. Do not put the dremel in the water. Duh, I know, but I would worry if I didn't mention that.


 Once I finished the three holes, I washed off the rock and added three mini air plants. How cute is this??? I love it.


Next I wanted to try writing on a rock. I am pretty new to this, but I love it so much and that makes practice a lot of fun. I just randomly wrote "Laugh Often" and added a little smiley face. I again dipped the rock in the water and then started to drill. Once I was done, it seemed kind of plain, so I drilled a hole and added an air plant. Again, super cute!


For my last rock of the day, I kept it simple. I drilled a heart and again, it was too plain, so I added a hole for, you guessed it, an air plant. I really like how simple it is, but how clean it looks.


Here is the finished three hole air plant rock:


And the finished Laugh Often rock.


If you are interested in any of these, they can all be found on my website at
www.etsy.com/shop/DeerwoodCreekGifts

Thanks for stopping by.
Peace out.
Cindy Breninger

Thursday, February 28, 2013

What's More Fun Than A Bag of Rocks?

What's more fun than a bag of rocks? Two bags of rocks!  

Today let's talk about rocks.
 
Rocks are fun. Rocks are cool. I love working with rocks. (I realize that that sounds geeky, but I really do like rocks.) I enjoy sifting through the huge piles of rocks and finding just the right one. It's like looking for a lost treasure. I look at each rock and wonder what I could make from it and if there is something about that intrigues me, I will take it home. 

I picked up a whole bunch of new rocks the other day and decided I wanted to somehow incorporate the air plants with the rocks. As some of you know, I love using my dremel, so, I used the dremel and made a hole in the rock and turned it into a one-of-a-kind air plant holder. I love bringing nature indoors and I think this simple little rock does that perfectly.


If you are interested in this, you can find it here:  

http://www.etsy.com/listing/123853195/engraved-rock-air-plant-holder-stone

Side note: In this photo, I told my kids I am a little bit county and a little bit rock and roll. (Get it? Boots/pile of rocks?). You would be surprised how many eye rolls I can get from my kids in one single day. haha 

Have a great day. Get out there and be creative. Go find some rocks and see what you can come up with, I would love to hear about it. :)

Cindy


www.etsy.com/shop/DeerwoodCreekGifts


Monday, February 4, 2013

How to make an engraved log candle holder.


 I often get asked how to engrave logs. I love answering this as it involves the dremel, which just so happens to be my favorite tool. I could talk about it for hours.

To make an engraved log candle holder, first get a log that you think has pretty bark. I love trees and love picking out the prettiest logs. Once I find one that is just right, I cut it with the skilsaw. My skilsaw has a 12" blade, so I can cut through about 5 1/2". So much fun! 

Once I get the log cut, then I drill the hole for the tea light. Once I finish drilling, I then sand the top and bottom of the candle and get it ready to engrave.

Now the real fun begins! I freehand on the log whatever I need to have engraved. Writing on tree bark is not easy, but it can be done with just a little bit of effort.     
 When I like how it looks, I fire up the dremel.  I set the dremel on the highest speed and start engraving. Oh, I always wear goggles and a face mask as I don't like getting things in my eyes or in my lungs that should not be there. I would suggest the same for you.


 You will find that sometimes it is easier to turn the log than to try to maneuver the dremel. To each their own, but I will turn the log around many, many times just to get around a corner. 


Once you are finished, you will have a very pretty, personalized, engraved log candle holder. 


Dust it off and add a clear coat and wha-laa! 
Your own engraved log candle holder.

Cindy Breninger
Deerwood Creek Gifts

www.etsy.com/shop/DeerwoodCreekGifts 


Friday, June 15, 2012

Making My First Clock - First of Many!


Having never made a clock before,  I never realized how much work actually goes into making them. I thought I could buy the anchor, buy the clock, insert the clock and whaaa-laaaa! instant clock. Nope.

The anchor turned out to be too thick for the clock to fit through, it did not come with a hole drilled in it nor did it have the back cut out for a place to put the clock mechanism. Off to the garage I went. 

First, I measured how much I needed to cut out from the back of the anchor so I could insert the clock mechanism. Then I drilled a hole all the way through.

After I measured what I wanted to cut out to fit the clock mechanism, I figured I would drill out as much as I could and then use the dremel to sand away the extra wood. (I don't have a router, so my options were pretty limited.)
I was going along just fine with the drill when I heard a sound I didn't want to hear. Snap! Part of the anchor broke off. But, as Bob Ross used to say, "There are no mistakes, only happy accidents." Bob was right. Having that part broken off actually made it a lot easier to cut out around the circle where I drilled.


At I first tried to cut out the extra wood with the jigsaw, but it was too powerful and almost broke the wood even more. I then took the dremel and sanded it. It got to the point where the wood was smoking from the heat from the dremel, so I put that aside to let it cool down.

I then took off the other side of the anchor, as it was much easier to sand that way.

I didn't have a way to cut the ends off the anchor as the dremel was too hot and the jigsaw was too powerful,  so I went and got a good old steak knife from the kitchen. It worked like a charm!

Thank you steak knife! I then cleaned up the wood, brought it inside and glued it. It is now sitting in my kitchen awaiting me to finish it. Going to paint it, add some customized words and some rope. Should be really cute when it is done. :)


I love making things when I have no idea what I am doing. It is fun to figure out. Makes me appreciate clocks a lot more, that's for sure.

Wednesday, May 16, 2012

The Sewing Machine and The Dremel

I recently acquired a sewing machine and a dremel. Did I mention I have never used either? But, I am so excited to learn how to use both of these, I can't wait to get started.

My plan for the dremel is to engrave the logs, coasters, toothbrush holders and/or anything else I can think of. This came about as I was asked to make a log toothbrush holder and could I engrave the side of it as if someone had written on the trunk of a tree. Oooh, I don't know how to do this, but you can bet I am going to home tonight and teaching myself how. I love the idea and can't wait! So many ideas floating around in my head that I can't wait to make them concrete.

As to the sewing machine, it is something I have always wanted to learn, but never got around to it. I now have a sewing machine and am going to take a class to explain it to me. I realized when I was calling the thread "string" and had no idea what a bobbin is or is used for, that I need a class. I want to make decorative pillow covers, ring bearer pillows, ipad covers and/or anything else I feel like making.

I truly love making new items and being creative, it is so much fun. I can't wait to learn these two new skills and see what I am come up with. :)

Take care,
Cindy Breninger
www.etsy.com/shop/DeerwoodCreekGifts
www.facebook.com/DeerwoodCreekGifts
www.twitter.com/DeerwoodCreek